I have to say that out of all the Library Science courses I have taken over the past year and a half, I honestly learned the most from this class. From volunteering in an elementary library the last three years, and now being a librarian myself, I know a lot about the books and the automation system. Technology, however, is something that I have always found a bit intimidating. I knew how to scan a qr code, I had my own personal Twitter and Facebook accounts, I had made a podcast or two, but that was about the extent of it. I had no idea how to begin to create my own qr code, infographic, screencasts, book trailer, etc. Now I am pleased to say that I can do all of these things and more! Some of the assignments I had more success with and enjoyed more than others, but even if I didn't necessarily find the app or program to be a good fit for me, I now know enough about them to share with others who may find them to be something beneficial to use in their classroom.
I think my number one favorite thing that I learned this semester was how to use Animoto. I always admired the library sites where they had produced their own book trailers or videos and was really curious about how they did that. Now not only do I know how to do it too, but I can teach others how to use them and incorporate it into my own library lessons. Learning how to create a screencasts is something else that I have always wanted to learn how to do, and I'm pleased to say that we got that opportunity this semester. I think this is something that would be a huge asset when it comes to explaining to both students and staff how to utilize different sites and web tools. Like right now I'm thinking of making a screencast showing how to make a comic using either MakeBeliefComix or ToonDoo, two more amazing things I learned how to do in this class. Graphic novels are so huge right now, and humor is always a great way to connect with students, so I truly believe these tools would really be great additions to any classroom or library. Not only did I simply learn how to use these sites, but also many wonderful ways to include them in a variety of classroom or library activities.
One of the activities that I kind of struggled with was creating an infographic. Given the choice of three different sites, and all the options available, I was a bit overwhelmed. I was able to complete one, though it wasn't nearly as impressive as others I have seen. I just found it to be a very time consuming process and I, like other teachers, just don't have a lot of that right now. Perhaps with more time to play around with it I will become more comfortable and be able to utilize it in the future. Something that I didn't like at all, or see much potential for was the use of Vine. Like I said before, six seconds just isn't enough time for me to say what I need to say or get my point across. All that being said, just because I didn't care for these tools doesn't mean I'm completely writing them off. I think they're ideas definitely worth sharing with other colleagues who may have a fantastic way to use them in their own lessons.
While I wouldn't necessarily refer to myself as tech savvy now, I have a lot more knowledge about educational technology than I did four months ago. The most important thing I learned is that technology is constantly evolving and changing, and things that were "hot" or popular a year or two ago may not be at all relevant now. As librarians, we must be up to date on the latest technological advances and all the new tools that are available. That means we have to make a conscious effort to read, research, explore and test out all the new sites and tools so that we can share our learnings with others.
Sunday, December 4, 2016
Sunday, November 20, 2016
Media (is) the Message?
The evolution of technology and communication mediums have been astronomical over the course of the last couple of generations. Dave Moffet says at one time in history the ball point pen was considered high tech (2013). Back in 1983, when Richard Clark stated that "media are mere vehicles that deliver instruction but do not influence student achievement any more than the truck that delivers our groceries causes changes in our nutrition," the first laptop had just been produced, few people had home computers and even fewer had access to the internet. Furthermore, "mobile" phones were clunky and required mobile operators and land line links, Windows had not yet been released, and home video game consoles were in their infancy (Becker, 2010). While Clark's statement may have been credible back in the early 80's, I just don't believe that this stance holds merit or is even relevant in today's digital world.
Eleven years later in 1994, Robert Kozma presented the argument that "certain media possess particular characteristics that make them both more and less suitable for the accomplishment of certain kinds of learning tasks." He said rather than trying to determine if media causes learning, we should be trying to determine how different forms of media affect learning. This just makes so much more sense to me in a world where students have grown up with a smart phone or IPad in their hands from their earliest years and spend a majority of their time interacting on Facebook, Twitter, and YouTube (Moffat, 2013). Students today have grown up in a world that is vastly different from the world in which their parents and teachers have grown up in. Rather than being limited to the knowledge of the adults around them, or information found in a book, students today can hop online and in a matter of seconds with a push of a few buttons can have access to a wealth of knowledge from people worldwide.
All that being said, I believe it would be a mistake for educators to not take advantage of all the types of medium that are available in our world. Clark says that if a particular medium seems advantageous, you should ask yourself if another set of attributes would lead to the same learning results. Well sure, I could stand in front of the class and lecture and hand them a worksheet and they may learn something. But by utilizing a variety of media, we are reaching out to the students in a way that they can better relate, they will be more receptive, engaged in and excited about the learning. I also believe that their chance of retaining the information, and perhaps even sharing their learning with others will be greater. There's a huge emphasis in differentiated instruction in today's schools, and we are constantly trying to find ways to connect with all students. There is not a one size fits all approach to teaching. We need to be armed with a variety of teaching methods and types of media to find what will work best for the students we are serving at a given time.
References
Becker, K. (2010). The Clark-Kozma Debate in the 21st Century. Retrieved November 19,
2016 from
http://www.academia.edu/462857/The_Clark-Kozma_Debate_in_the_21st_Century
EduTech Wiki. (2012). The Media Debate. Retrieved November 19, 2016
from http://edutechwiki.unige.ch/en/The_media_debate
Moffat, D. (2013). Clark and Kozma Debate is it Still Relevant? Retrieved November 19,
2016 from
https://dcmoffat71.wordpress.com/2013/04/17/clark-and-kozma-debate-is-it-still-relevant/
Sunday, November 13, 2016
Podcasts
Honestly, before beginning my library science courses just a year ago, I had only heard the term "Podcast" but had no idea what it was. When reviewing the syllabus for my first course, I learned that we were going to be creating our own Podcast and I was actually pretty terrified. It turns out that podcasting is simply the ability to create or listen to audio content either live or downloaded for later use (Wikispaces, 2012). There, that doesn't sound so scary, does it? Well maybe still a little if you have no idea how to begin. Lucky for you there are some really easy, and more importantly FREE, tools available online for you and your students to create your own podcasts.

The first podcasting site I tested out was SoundCloud. It is very easy to sign up simply by linking to your Facebook account. I only signed up for the free account which allows you 180 minutes of upload time, but there are also options for a Pro account for $7/month which doubles that time and includes advanced features, or even the ProUnlimited account for $15/month which allows you unlimited upload time. I simply clicked the Upload button and was given a choice to upload a file or begin a new recording. When you click the record button it will ask you for access to your camera and microphone. Once you click allow, make sure you are ready to begin before pressing the record button because it starts fast. Of course if you make a mistake, there is a button to start over thank goodness. I suggest having a script because if not you may be starting over MANY times like me! Once you are happy with your recording you can upload it, give it a name and description and choose whether to make it public or private. Overall, SoundCloud was very easy to use, even for a beginner.

Signing up for AudioBoom was quick and easy, just create a user name, give your email address and create a password and your in. Or so I thought...Then I was taken to the next page that asked for my name, email, link to my current podcast, a name for my podcast, the country, the category, a description...oh gosh, when can I just record something? Then I get to the next page and it dawns on me, I'm not exactly signing up, I'm basically applying to sign up! After entering all that information I am taken to a screen that says they will review my information and if they feel I am a good fit they will be in touch. So I can listen to other podcasts, but to create my own I need to be approved apparently. In the mean time I can set up my profile and adjust my settings. This has been a disappointment when all I really wanted to do is record my own podcast. If your goal is just to listen to other podcasts then I guess this would be an okay site. Otherwise you need to plan ahead and get preapproved before being able to record anything here.
 PodOmatic is another podcasting site that is easy to sign up for using your Facebook account. Then you are given a choice to sign up for the Free Basic account with 500 MB of storage, or the Pro account which runs around $120, but with a two month discount I was offered would have been only $100. Right away at the top of my home screen I noticed a button that said Create a Podcast, so I clicked there assuming this was going to be easy. Only there is no record button of any kind, only the option to add and upload a file. So I had to open up my voice recorder and record my podcast, then upload that file into PodOmatic. Gave it a name and a description and then hit publish. It was fairly easy once I figured out what I needed to do, but maybe not so much for a student or someone brand new to podcasting.
Out of the three sites I explored, I have to say that SoundCloud was my hands down favorite. It was the easiest of the three for me to use and I believe students and teachers would feel the same way when trying to utilize any of these sites in a classroom or library. Here is the podcast I created using SoundCloud (I'm kinda sick right now, so please excuse my voice)...
Resources
Eash, E.K. (2006). Podcasting 101 for K-12 Librarians. Information Today, Inc.
Retrieved November 12, 2016 from
http://www.infotoday.com/cilmag/apr06/Eash.shtml
Wikispaces. (Last Revision 2012). Podcasting in Education. Wikispaces. Retrieved
November 12, 2016 from
http://podcasting-in-education.wikispaces.com/#x-Finding%20Podcasts
The first podcasting site I tested out was SoundCloud. It is very easy to sign up simply by linking to your Facebook account. I only signed up for the free account which allows you 180 minutes of upload time, but there are also options for a Pro account for $7/month which doubles that time and includes advanced features, or even the ProUnlimited account for $15/month which allows you unlimited upload time. I simply clicked the Upload button and was given a choice to upload a file or begin a new recording. When you click the record button it will ask you for access to your camera and microphone. Once you click allow, make sure you are ready to begin before pressing the record button because it starts fast. Of course if you make a mistake, there is a button to start over thank goodness. I suggest having a script because if not you may be starting over MANY times like me! Once you are happy with your recording you can upload it, give it a name and description and choose whether to make it public or private. Overall, SoundCloud was very easy to use, even for a beginner.
Signing up for AudioBoom was quick and easy, just create a user name, give your email address and create a password and your in. Or so I thought...Then I was taken to the next page that asked for my name, email, link to my current podcast, a name for my podcast, the country, the category, a description...oh gosh, when can I just record something? Then I get to the next page and it dawns on me, I'm not exactly signing up, I'm basically applying to sign up! After entering all that information I am taken to a screen that says they will review my information and if they feel I am a good fit they will be in touch. So I can listen to other podcasts, but to create my own I need to be approved apparently. In the mean time I can set up my profile and adjust my settings. This has been a disappointment when all I really wanted to do is record my own podcast. If your goal is just to listen to other podcasts then I guess this would be an okay site. Otherwise you need to plan ahead and get preapproved before being able to record anything here.
Out of the three sites I explored, I have to say that SoundCloud was my hands down favorite. It was the easiest of the three for me to use and I believe students and teachers would feel the same way when trying to utilize any of these sites in a classroom or library. Here is the podcast I created using SoundCloud (I'm kinda sick right now, so please excuse my voice)...
With the huge emphasis placed on differentiating instruction in recent years, podcasting is an excellent way to offer remedial or extended support for those in need, or an extra challenge for more advanced students. It's also a fantastic way to enhance instruction for those students who are auditory learners. Not only can students listen to gain information and knowledge, but they can also be creators of information recording their own podcast; discussing research, books they have read, conducting interviews, etc. Teachers and librarians can also use podcasts as a way to share information with students, staff and parents about upcoming projects, events, trainings,and programs. These are just a few of the endless ways to incorporate podcast into your classroom or library.
Resources
Eash, E.K. (2006). Podcasting 101 for K-12 Librarians. Information Today, Inc.
Retrieved November 12, 2016 from
http://www.infotoday.com/cilmag/apr06/Eash.shtml
Wikispaces. (Last Revision 2012). Podcasting in Education. Wikispaces. Retrieved
November 12, 2016 from
http://podcasting-in-education.wikispaces.com/#x-Finding%20Podcasts
Sunday, November 6, 2016
Cartoons and Comics
Creating your own comic strips and cartoons is a great way to reinforce concepts taught in the classroom. It also give students a creative way to express their ideas and show what they know. Here are three sites that you may want to explore for fun, easy and FREE ways to create comics for your classroom or library..


The nice thing about Make Beliefs Comix is that you don't have to create an account, you can just jump right into creating. It automatically starts you off with three panels, but there is an option to change to either two panels or four. There are 13 different backgrounds to choose from, or you may select a solid color background. There are about 50 characters available for use, and each one has 3-4 different emotions to choose from to fit a variety of situations. You can then add word or thought bubbles, panel prompts, and a number of words and objects to enhance your comic. Adjusting the location and size of the items is simple and after playing around with the site for just a bit, I was easily able to create this comic to go along with our upcoming book fair...

Because you do not create an account, you can not save comics in Make Beliefs Comix so make sure that you either print it, email it or save it to your computer!
To use ToonDoo, you must first create an account, but it is quick to do and soon you will be ready to create your comic. There are a number of layouts to choose from in different sizes, both horizontal and vertical, with 1-4 panels. Once you select your choice, loading takes a while. In reality it's only about a minute, but in a world where we want to click and be taken to the next step immediately it was a little frustrating. Once the creating screen loads you will find a wide variety of different characters, backgrounds, props, text options, etc. to add to your comic. It can be a little overwhelming at first with all the choices, but with so much to choose from you can really make a quality comic for any scenario. With the click of a button you can change the emotion and posture of your characters, adjust the size, flip them around or rotate them to fit your needs. I made this simple comic to show parts of the water cycle, but look forward to playing around more with this site to make a more involved comic.

Like with ToonDoo, to utilize Pixton you must first create an account. What I like about this site is that it gives you an option to either create a comic from a blank layout, or you can also create from a template, which is a complete comic that can be modified to fit your needs. If you choose to start from scratch, there are many options to help you make the comic that best fits your needs. Whether you want a comic strip, story board, mind map, time line, plot diagram, or poster, Pixton can help you create just what you need. There is a large number of backgrounds to choose from and once you select the one you want, you are provided with an option for one, two or three characters. Depending on the background you choose, the selection of characters you are offered is different and varies from about 6-8 characters. You may then change the poses and the expressions of the characters to fit the scene and add your desired text. You may also add additional panels as needed. To make my comic in Pixton, I selected a template of an already completed comic and modified it by adding characters and speech bubbles with text. I was not able to download the comic with only the free account, but I could email it to get the link to share or save.

*After playing around and making three comics I was told that I had reached the limit of my free account.
For a list of ways to utilize comics in your classroom, visit 25 Ways to Use MakeBeliefsComix.com in the Classroom. As far as using comics in the library, here are some ways I plan to incorporate their use...
- Students can create storyboards for books they have read
- Students can create book promotions for books they have read
- Students can illustrate knowledge of concepts introduced
- Promote events taking place at school or in the library
- Just for fun!
My favorite sites that I enjoyed using and plan to use with students are MakeBeliefsComix and ToonDoo. I think if you want something quick and simple MakeBeliefsComix is the way to go. However if you have more time and are wanting something more involved, then ToonDoo is a great choice. I believe given time to explore and play around a bit, students will enjoy and successfully use both of these sites.
Sunday, October 30, 2016
Videos and QR Codes in the Library
For this assignment, I was asked to look at how YouTube and QR Codes could be used in the library. Let me first begin with videos and YouTube. Kids nowadays spend hours on end watching videos on YouTube, from gaming videos, makeup tutorials, music videos and more. I know this for a fact because I'm currently staring at my own two children who love nothing more than sitting in the exact same spot on the couch all weekend in their pjs watching videos on YouTube. Therefore it makes so much sense for us to attempt to reach out to our students using this resource and connect with them in a way which they can relate. YouTube provides libraries an excellent way to showcase student work, share instructional videos, and offer a glimpse into what is going on in the library. Here are just a few video recommendations from four channels I looked at as I was evaluating the usefulness of YouTube in the library.
Norman High School Library
Video that is most helpful to students; How to Use EBSCOHost
Video that is most helpful to students; How to Add a Web-Based Video (YouTube, CNN Video, CBS News, Etc.) To Your Netvibes Page
Pikesville High School Library
Video that is most helpful to students; PHS Financial Aid Workshop 2013
Bonnie Branch Middle School
Video that is most helpful to students; NHD Annotation Writing

Norman High School Library
Video that is most helpful to students; How to Use EBSCOHost
Video that students would like the best; Tiger Visits The Norman High Library
The Unquiet Library
Video that is most helpful to students; How to Add a Web-Based Video (YouTube, CNN Video, CBS News, Etc.) To Your Netvibes Page
Video that students would like the best; Why I Love Evernote: The Student Perspective
Video that is most helpful to students; PHS Financial Aid Workshop 2013
Video that students would like the best; AVID Pimp My Binder 2012
Bonnie Branch Middle School
Video that is most helpful to students; NHD Annotation Writing
Video that students would like the best; Bring Them Back Overdue Library Book Parody
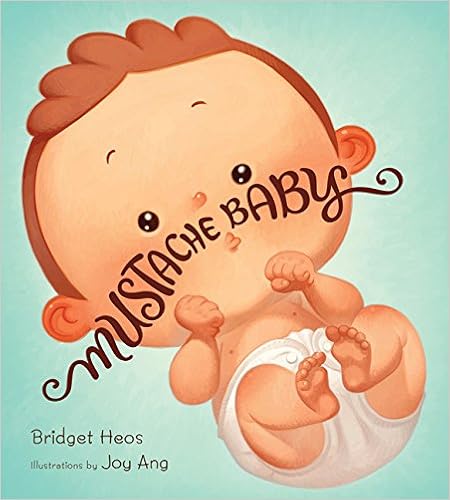
Next I explored Animoto for the purpose of making a book trailer and QR codes. I have to say I was very excited about learning how to use each of these resources and how I might incorporate them into my library. I really enjoyed my experience with Animoto and found it fairly easy to use as far as adding photos, text and music to my videos. I did encounter a problem with a couple of my photos and them not being shown in their entirety. I even tried adjusting the size and switching the picture, however for some reason, while the entire picture was shown on my tiles on the creation screen, only a portion was shown on the actual video. I'm noticing that the images with the problems were square images as opposed to the others which were rectangular, so perhaps that is the problem. Overall however, I was pretty happy with my first attempt at making a book trailer. Scan the QR code below to check out the book trailer I made for Bridget Heos' book Mustache Baby.
When Baby Billy is born with a mustache, his family takes it in stride. They are reassured when he nobly saves the day in imaginary-play sessions as a cowboy or cop and his mustache looks good-guy great. But as time passes, their worst fears are confirmed when little Billy’s mustache starts to curl up at the ends in a suspiciously villainous fashion. Sure enough, “Billy’s disreputable mustache led him into a life of dreadful crime.” Plenty of tongue-in-cheek humor and cartoonish illustrations make this the perfect baby-shower gift for a mustachioed father-to-be.
Besides sharing book trailers, I also came across some other great ways to use QR codes in the library. Placing a QR code near the copier or self check out station could be a great way to offer instructions to those students who need assistance. Place QR codes around the shelves in the library that direct students to websites for further information on specific topics. A QR code placed near the door could be helpful for students and parents to scan and quickly gain access to the library's website, blog, or social media page. Or how about a library tour for new students/parents. Tired of being asked for another form of some kind or where they can get one? It could be as easy as a quick QR code scan away. The possibilities really are endless.
Resources
Amazon. Mustache Baby. Retrieved October 29, 2016 from https://smile.amazon.com/Mustache- Baby-Bridget-Heos/dp/0547773579/ref=sr_1_1?ie=UTF8&qid=1477855285&sr=8-1&keywords=mustache+baby
Animoto. Retrived October 29, 2016 from https://animoto.com
Crayons and Croissants. (2013, July 29). Mustache baby - Book review. Retrieved October 29, 2016 from https://crayonsandcroissants.com/2013/07/29/mustache-baby-book-review/
Eduscapes. Scan me! QR codes in the school library. Retrieved October 29, 2016 from http://eduscapes.com/sessions/qrcodes/
Heos, B. Mustache baby. Bridget Heos. Retrieved from http://www.authorbridgetheos.com/mustache-baby.php
Jones, G. (2014, August 17). 10 things to do with QR codes on back to school night. The Daring Librarian. Retrieved October 29, 2016 from http://www.thedaringlibrarian.com/2014/08/10-things-to-do-with-qr-codes-on-backto.html
QRStuff. QR code generator. Retrieved October 29, 2016 from http://www.qrstuff.com/
the1stdaughter. (2013, May 13). Mustachebabyinterior. There's a Book. Retrieved October 29, 2016 from http://www.theresabook.com/2013/05/book-review-and-giveaway-mustache-baby-by-bridget-heos/mustachebabyinterior/
Sunday, October 23, 2016
Instagram, Vine, and Screencast
This week's assignment was a challenging one for me. I actually had an Instagram account that had not even one post, my only experience with Screencasts were links to videos from professors, and I had never even heard of Vine! All in all though I would say that I had a very positive experience, not only in my venture to figure out how to use all of these applications, but in the ideas I stumbled across with how to use these features in my library and how to share them with teachers for use in their classrooms.

Since I had the most experience with Instagram, although limited, I decided to start there. Instead of using my personal account, I chose to create a brand new one specifically for school and library information. Sadly most of my "friends" or followers aren't that into what's going on in my library. Shocking? I know right! I didn't download any additional apps to add text to my photos, but perhaps in the future. I could definitely see value in that. I think Instagram is a great place to share photos of reading recommendations, new books in the library, important information and activities taking place in the library.

My next exploration was Screencast-O-Matic. I wanted to create a video showing students how to check in and out their own materials since we've been having a little trouble with that, however with no scanner at home, that idea quickly went out the window. I do think that would be a great idea though and will be making a video on that soon. For now I settled on creating a screencast exploring our library webpage. The application itself was easy to install and use and I love that it gave a countdown of 3, 2, 1 to allow you to ready yourself. You can record just the screen, just the webcam or both. Here is the video I created, Wrangler Library Webpage.


After that, I decided to use my IPhone to give Adobe Spark a try. It had a variety of templates to use to help you in creating a video best for your purpose including Show What Happened, Teach a Lesson, Promote an Idea and more. Or you could choose to start from scratch. I decided to use a template to showcase our recent Poetry Share held in the library this past week. It gave me a set of slides and provided me with an idea of what to include on each slide. I had the option of adding icons, photos or text to each and could make a recording to accompany it. Here is the short video I created about the First Annual Richter Wrangler Poetry Share.
The last application I utilized was Vine. Vine is a video sharing site that limits users to a video of 6 seconds in length and plays on a loop. While I guess I could see possibilities for use of this app in the classroom or library, I have to say I was definitely the least impressed with it. From the reading I did, they claimed you would be surprised how long 6 seconds actually is. I disagree. I struggled to think of anything I could share with only 6 seconds and went through several video attempts where there simply was not enough time to cover all the information I had. It does force the sharer to get right to the point, which I guess has it's advantages, but with all the other options available, I just don't see myself using this app all that much. I did manage to squeeze in a quick shout out to all our Wrangler Readers of the Week.
Our students live in a digital world and applications such as these are a great way to reach out to them and connect on their level. A big part of our job as librarians is to be knowledgeable of the variety of technological sources out there and be able to share that information with students, staff and colleagues. As much as I was dreading it, I found this assignment to be extremely beneficial and I really learned a lot!
Saturday, October 15, 2016
Infographics
For my very first venture into infographics, I played around with and compared three sites, easel.ly, infogr.am, and Piktochart. I began with infogr.am, where with the free Basic program I was allowed only public content, 10 infographic projects, up to two map charts and up to two image downloads. It was fairly easy to use. I was given the option of 11 different templates and upon selecting one, it was easy to edit the title and charts/graphs, add text and media, as well as upload pictures from my computer. An upgrade to the Pro plan for about $230/year allows you to store your project privately and offers a much wider variety of templates, maps and image options.
The second site I toyed around with was easel.ly. Like infogr.am, I was easily able to create an account by linking to my Facebook account. However, I wasn't prompted to enter some absurdly weird username as I was in infogr.am. I was taken directly to the project page where I could choose a template. There were an abundance of publicly available visuals that you could choose and edit, or there was an option to start from scratch. With the click of a button you could insert objects in a variety of themes, stock photos or you tube videos. You can also change the background, draw, add shapes, text or charts. I like that there was also a zoom button where I could shrink the image and view the entire infographic without having to scroll the page down. With the free account I had access to 60 free images and 10 fonts. By upgrading to the Pro account for only $3/month you could access over 600,000 images and 50 fonts. It would also allow you to keep your work private and upload your own fonts and logos.
The last site I explored and my favorite was Piktochart. Like the ones before it, it was easy to sign up using my Facebook account and I was taken to the project screen were I could choose to create an infographic, presentation, poster or report. There were 10 templates to choose from with my free account or I could start from scratch. With the graphics button there was plenty to choose from including, shapes, lines, icons, photos and frames. It was also a breeze to upload my own pictures from my computer. There were plenty of backgrounds to choose from, as well as text options and frames. You could easily insert and edit charts, maps and graphs, and even insert a link to a Survey Monkey survey! And this was all with the free account. There are two options for upgrades, a Lite account for $15/month and a Pro account for $29/month. I only wish there were a zoom in/out button so that I could easily view the entire graphic on one page. It was a little difficult to arrange properly when I couldn't see the whole thing at once. Here is the graphic I ultimately created using information from the Pew Research Center...

Sources
Pew Research Center. (November, 2012). Politics Fact Sheet. Retrieved
Subscribe to:
Comments (Atom)